

State Management in React.Js Using Redux
Simplified state management: Traditional vs Redux Toolkit


When writing this article, I am building a replicate of the Socket Plugin alongside my mentor and a few friends. You can check out My React Plugin Journey, a series I dedicated to writing on the build journey. As a part of our activities during the period, we were assigned topics to present on. This tutorial article is my presentation topic, and I will share my knowledge on the subject with you through this article.
Throughout the article, we would work with a simple componentized counter application. The counter app would keep evolving as we navigate from the traditional to the third-party library-aided techniques of managing states in React.
Prerequisites
Basic knowledge of JavaScript and React.Js
Familiarity with npm
Understanding “Component State” and “State Management” in React.
Component State
Imagine you have a toy car with a button on it. When you press the button, the vehicle can do different things, like moving forward, backward, or making a sound. Now, the car's button is like a component state. It keeps track of what the car can do at any given time. When you press the button, it changes the vehicle's state and knows what action to take based on that state.
If the state is "move forward," the car will start moving when you press the button. If the state is "make a sound," the vehicle will make a sound when you press the button.
A component state is like the car's button. It helps a component in a React application know what it should do based on its current state. Just like the toy car knows how to behave based on the button you press, a component knows how to do different things based on its state, which may change due to direct or indirect user actions.
State Management
Imagine you're a librarian in an extensive library with thousands of books. Your job is to ensure the books are organized and easy to find for anyone wanting to read them.
In React, state management is similar. It involves using a system to organize and keep track of important information. It helps the program know where to find and how to handle data, making sure everything is in order and readily available when needed.
Managing States Traditionally
While third-party libraries are helpful, it's crucial to appreciate the traditional techniques used before modern civilization.
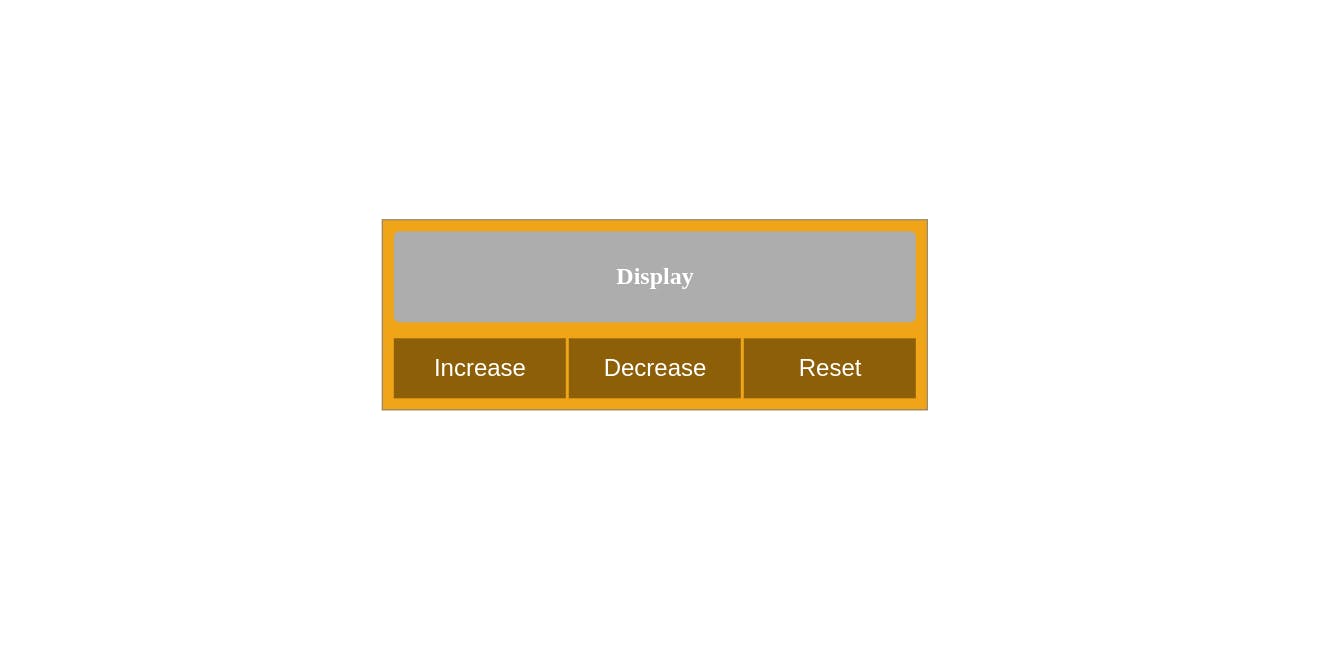
Throughout this section, we'll work with the simple counter application I discussed. Clicking on either the Increase, Decrease, or Reset buttons would result in a number increase, decrease, or reset to the default counter value. Since we'll focus on implementation, don't worry about the component(s) styles.
To clone the repo into your local machine, open up your terminal, navigate into a preferred directory, and run the following command:
git clone -b starter https://github.com/utin-francis-peter/state-management-tutorial
The above command will clone the starter branch of the repo into your local machine.
After opening the project folder with your favourite IDE, your project structure should be as seen in the screenshot below. Feel free to adjust the structure to suit your preference.

Next, run the following command in your terminal to install dependencies and start the development server:
yarn && yarn start
or
npm install && npm run start
Voilà! You should see the page displayed on your browser as seen below:
Now let's explore some traditional state management hooks:
useState
useState presents developers with the magical power of re-rendering only specific components in our react applications. useState helps re-render only a component whose state has been updated. If there are sub-components connected to the component that re-renders, the children component also re-renders without affecting components that are not directly linked to the affected parent component.
During initialization, a state variable, handler function, and an initial value for the state variable must be provided. The stored data of a state variable can be of any supported JavaScript or TypeScript data type. In this article, we shall work with supported JavaScript data types since it's not a TypeScript project.
For a child or nested children component to trigger a change on a parent component, the handler function must be sent from the parent to the child as a prop. When a specified event happens in the child component, the child can trigger the passed-down handler function to cause an update in the parent's state. The same applies to using a state variable in children component(s).
Below is a useState snippet:
import { useState } from "react";

const initialState = {
    count: 0,
  };
const [counter, setCounter] = useState(initialState);
Note the following:
counter: this is the state variable. Subscribing any component to this state variable would result in the component re-rendering once there is a state update.
setCounter: this is the handler function responsible for updating the value of the state variable. Each time this function is invoked, and all specified conditions are met, the counter state gets updated.
useState(initialState): this holds the current value of the state variable. An initial value for the state variable must be specified.
Let's get our counter app working. Go into your Counter.jsx file and replace it with the codes below:
// Counter.jsx

import { useState } from "react";
import Decrease from "../components/Decrease";
import Increase from "../components/Increase";
import Reset from "../components/Reset";

const Counter = () => {
  const initialState = {
    count: 0,
  };
  const [counter, setCounter] = useState(initialState);

  // defining reducers or handlers to update the counter state when invoked
  // multiple handlers are used so either of them can get invoked based on predicted action
  const handleIncrease = () =>
    setCounter({ ...counter, count: (counter.count += 1) });
  const handleDecrease = () =>
    setCounter({ ...counter, count: (counter.count -= 1) });
  const handleReset = () => setCounter({ ...counter, count: 0 });

  return (
    <section className="counter-app">
      <div className="counter-app_inner">
        <h2 className="display">{counter.count}</h2>
        <div className="controls">
          <Increase handleIncrease={handleIncrease} />
          <Decrease handleDecrease={handleDecrease} />
          <Reset handleReset={handleReset} />
        </div>
      </div>
    </section>
  );
};

export default Counter;
In the Counter component, the h2 element subscribed to the counter state variable and will rerender each time there is an update in the state. Also, different handler functions were created to help invoke the state handler function based on predicted actions.
The Increase, Decrease, and Reset child components each return a button element that would be used to invoke the handler functions created in the parent component. These different components represent different predicted actions. Based on an expected activity (like an onClick event) on the child components, either of the handler functions would get invoked to cause an update in the counter state.
Next, we must go into the child components and consume the received props.
Now go into your Increase.jsx file and replace it with the codes below:
//Increase.jsx

const Increase = ({ handleIncrease }) => {
  return <button onClick={handleIncrease}>Increase</button>;
};

export default Increase;
Next, go into your Decrease.jsx and Reset.jsx files and replace them with the codes below:
//Decrease.jsx

const Decrease = ({ handleDecrease }) => {
  return <button onClick={handleDecrease}>Decrease</button>;
};

export default Decrease;
//Reset.jsx

const Reset = ({ handleReset }) => {
  return <button onClick={handleReset}>Reset</button>;
};

export default Reset;
Now you can test your counter app to see if it works.
useReducer
With useReducer, change of state gets better managed. Unlike in useState, where multiple functions were created to invoke the state updater function and change the state based on an anticipated action, useReducer uses one reducer function to update the state based on an action type.
useReducer becomes handy when a component has multiple states, which isn't the case with our Counter component.
Below is a useReducer snippet:
const [state, dispatch] = useReducer(reducer, initialState);
Note the following:
state: this is the state variable.
dispatch: this is otherwise called the dispatch object. Within the object, we can specify the action type and payload properties. With the action type property, we can specify what action is carried out on a component. Based on the specified action type, the reducer function then updates the state variable.
reducer: the function takes in the state and action. Based on an action type, it updates the state variable.
initialState: this stores the current value of the state variable.
Let's implement this on our counter app.
Now go to your Counter.jsx file and paste the code below:
// Counter.jsx

import { useReducer } from "react";
import Decrease from "../components/Decrease";
import Increase from "../components/Increase";
import Reset from "../components/Reset";

const Counter = () => {
  const initialState = {
    count: 0,
  };

  const reducer = (state, action) => {
    switch (action.type) {
      case "increase":
        return { ...state, count: state.count + 1 };
      case "decrease":
        return { ...state, count: state.count - 1 };

      default:
        return { ...state, count: 0 };
    }
  };

  const [counter, dispatch] = useReducer(reducer, initialState);
  return (
    <section className="counter-app">
      <div className="counter-app_inner">
        <h2 className="display">{counter.count}</h2>
        <div className="controls">
          <Increase dispatch={dispatch} />
          <Decrease dispatch={dispatch} />
          <Reset dispatch={dispatch} />
        </div>
      </div>
    </section>
  );
};

export default Counter;
Also, update the Increase.jsx, Decrease.jsx, and Reset.jsx files accordingly:
// Increase.jsx

const Increase = ({ dispatch }) => {
  return (
    <button onClick={() => dispatch({ type: "increase" })}>Increase</button>
  );
};

export default Increase;
// Decrease.jsx

const Decrease = ({ dispatch }) => {
  return (
    <button onClick={() => dispatch({ type: "decrease" })}>Decrease</button>
  );
};

export default Decrease;
// Reset.jsx

const Reset = ({ dispatch }) => {
  return <button onClick={() => dispatch({ type: "reset" })}>Reset</button>;
};

export default Reset;
Context API
Context API in React helps create a data store containing states and handler functions that can be accessed at different application levels without drilling down props to direct/indirect children components; context API helps solve the problem of prop drilling in React.
Below is the idea behind context API:
A context is created using the createContext() API.
Next, the created context is exported as a custom hook for consumption using the useContext() API.
Afterward, a context Provider component is created. This component holds all available states and handlers and provides them to its children components.
Let's manage our counter application state using context APIs and the useReducer hook.
First, create a src/context/counter.context.jsx file that would hold all the counter context. Open your counter.context.jsx file and code along with me.
Step 1: Create a new context variable:
// counter.context.jsx

import { createContext, useContext, useReducer  } from "react";
// create context variable
const CounterContext = createContext();
Step 2: Export context as a custom hook:
// function returns the created context in a usable form (useContext)
export const useCounterContext = () => useContext(CounterContext);
Step 3: Create the context provider component and export it:
const CounterContextProvider = ({ children }) => {
/*
within the provider component, the useReducer hook is used to manage the counter state
while the created context helps ship the state and handlers to the
entire application
*/
  const initialState = {
    count: 0,
  };

  const reducer = (state, action) => {
    switch (action.type) {
      case "increase":
        return { ...state, count: state.count + 1 };
      case "decrease":
        return { ...state, count: state.count - 1 };
      default:
        return { ...state, count: 0 };
    }
  };

  const [counter, dispatch] = useReducer(reducer, initialState);

  return (
    <CounterContext.Provider value={{ counter, dispatch }}>
      {children}

    {/*
        The value attribute stores and makes the context state
and reducers available to children components when the useContext hook is invoked.
In this case, the counter state and dispatch object is stored in an object.
        */}
    </CounterContext.Provider>
  );
};

// exporting the Context Provider Component
export default CounterContextProvider;
Step 4: Wrap the Counter component in your App.jsx file with the context provider so the context is made available to the entire counter application. To make the context available to an entire react application, wrap the root component with your context provider component.
// App.jsx

import Counter from "./app/Counter";
import CounterContextProvider from "./context/counter.context";
import "./styles.scss";

const App = () => {
  return (
    <>
      <CounterContextProvider>
        <Counter />
      </CounterContextProvider>
    </>
  );
};

export default App;
Step 5: Import the exported context in Step 3 into your Counter component and subscribe to the needed state.
// Counter.jsx

import Decrease from "../components/Decrease";
import Increase from "../components/Increase";
import Reset from "../components/Reset";
import { useCounterContext } from "../context/counter.context";

const Counter = () => {
// destructuring counter state from the context.
  const { counter } = useCounterContext();
  return (
    <section className="counter-app">
      <div className="counter-app_inner">
        <h2 className="display">{counter.count}</h2>
        <div className="controls">
          <Increase />
          <Decrease />
          <Reset />
        </div>
      </div>
    </section>
  );
};

export default Counter;
Step 6: To trigger a change in the counter state based on user action, the dispatch object from our counter context must be sent to the components responsible for triggering these state changes.
Now, go into your Increase.jsx, Decrease.jsx, Reset.jsx files, and paste in the codes below accordingly:
// Increase.jsx

import { useCounterContext } from "../context/counter.context";

const Increase = () => {
// destructuring dispatch object from the context.
  const { dispatch } = useCounterContext();
  return (
    <button onClick={() => dispatch({ type: "increase" })}>Increase</button>
  );
};

export default Increase;
// Decrease.jsx

import { useCounterContext } from "../context/counter.context";

const Decrease = () => {
// destructuring dispatch object from the context.
  const { dispatch } = useCounterContext();
  return (
    <button onClick={() => dispatch({ type: "decrease" })}>Decrease</button>
  );
};

export default Decrease;
// Reset.jsx

import { useCounterContext } from "../context/counter.context";

const Reset = () => {
// destructuring dispatch object from the context.
  const { dispatch } = useCounterContext();
  return <button onClick={() => dispatch({ type: "reset" })}>Reset</button>;
};

export default Reset;
That's the idea behind using Context API to manage an application's state. Next up is shifting away from the traditional approach to a more modern process that involves using a third-party library like Redux Toolkit to seamlessly manage our application's states.
State Management With Redux Toolkit
Introducing Redux and the Idea Behind It
Redux is a state management library that aids with the management of complex application states in a predictable and organized manner. Just like we did in the useReducer hook, where reducers were created for different actions, similar reducers are created for states in the Redux store to help predictably update our application state.
The idea behind Redux is as follows:
The store holds the States of your application. A state defines the User Interface (UI) and only changes when a predicted action occurs.
Actions on the UI trigger the state reducers.
Reducers handle state modifications based on a predicted action. Reducers are pure functions invoked to do something to the application state.
Introducing Redux Toolkit and Its Benefits
Redux Toolkit is an opinionated package that simplifies the process of working with Redux by providing a set of abstractions.
While Redux helped solve the problem of complex state management in React, it also introduced some issues that got addressed by Redux Toolkit. We'll explore a few of these problems and see how Redux Toolkit helped fix them.
Boilerplate codes: Redux Toolkit comes with fewer boilerplate codes when compared with Redux.
Store Configuration: Unlike with Redux, where store configuration is manual, you just have to import and call the
configureStorefunction with Redux Toolkit.Async operations: Redux toolkit provides us with the
createAsyncThunkfor performing Async operations.Slice: Redux Toolkit introduced the Slice approach for managing states in a more organized manner. While the store contains all application states, a slice is a particular state containing its initial state value, action creators, and handler functions.
Managing Counter App State With Redux Toolkit
Throughout this sub-section, we'll use a step-by-step approach to managing the state of our counter application using Redux Toolkit. Refrain from fretting, as you'll learn on the job.
We'll achieve this in two stages:
Setup: The setup stage would encompass creating and configuring our store, creating a slice with its reducers and action creators, and adding the slice to our store.
Subscription: The subscription stage would involve selecting a desired state with the
useSelector()function and sending actions to the state slice to help trigger state updates using theuseDispatch()function. These functions are made available by Redux.
Redux and Redux Toolkit has already been installed for you. Curious? You can read the official redux toolkit installation guide.
Now, let's proceed with the setup stage:
First, create a src/redux folder. Within the redux folder, create a store.jsx file that would hold all the global states.
Step 1: Open your store.jsx file, create, and configure your store:
// store.jsx

import { configureStore } from "@reduxjs/toolkit";

export const store = configureStore({
  // reducer would contain your global states.
  // For now, leave the reducer object empty.
  reducer: {},
});
Step 2: Open your index.jsx file. Import the Provider component from react-redux, enter the created store as a prop of the Provider component, and wrap your root App component with it. This step is essential to make the states in your redux store accessible to your entire application.
// index.jsx

import React from "react";
import ReactDOM from "react-dom/client";
import App from "./App";
import { store } from "./redux/store";
import { Provider } from "react-redux";

const root = ReactDOM.createRoot(document.getElementById("root"));
root.render(
  <React.StrictMode>
    <Provider store={store}>
      <App />
    </Provider>
  </React.StrictMode>
);
Step 3: Create a file named src/redux/counter.slice.jsx. This file would contain the counter app slice. The slice object would have the name, initialState, and reducers properties of the counter state. Through this, we'll successfully isolate all logic associated with modifying the state of the counter away from the global states store, making it more manageable.
 // counter.slice.jsx

import { createSlice } from "@reduxjs/toolkit";

const initialState = {
  count: 0,
};

const counterSlice = createSlice({
  name: "counter",
  initialState,
  reducers: {
    // contain action methods that handle state updates when dispatched
    increase: (state) => {
      return { ...state, count: state.count + 1 };
    },
    decrease: (state) => {
      return { ...state, count: state.count - 1 };
    },
    reset: (state) => {
      return { ...state, count: 0 };
    },
  },
});

// export actions separately so each action type can be used to trigger any of the reducers to update counter state.
export const { increase, decrease, reset } = counterSlice.actions;
// export slice reducer so it can be imported and added to the global store's reducer object
export default counterSlice.reducer;
Step 4: Open your store.jsx file and add the created counter slice to the store:
// store.jsx

import { configureStore } from "@reduxjs/toolkit";
import counterSlice from "./counter.slice";

export const store = configureStore({
  reducer: {
    counter: counterSlice,
  },
});
Congratulations on making it this far. Let's proceed with the subscription stage:
Step 1: Let's subscribe to the counter state so the current value of the counter gets rendered on the element. The useSelector() function would be invoked to return our desired state. In your Counter.jsx file, paste the codes below:
// Counter.jsx

import { useSelector } from "react-redux";
import Decrease from "../components/Decrease";
import Increase from "../components/Increase";
import Reset from "../components/Reset";

const Counter = () => {
  // pulling out needed state from store
  const counter = useSelector((state) => state.counter);

  return (
    <section className="counter-app">
      <div className="counter-app_inner">
        <h2 className="display">{counter.count}</h2>
        <div className="controls">
          <Increase />
          <Decrease />
          <Reset />
        </div>
      </div>
    </section>
  );
};

export default Counter;
Step 2: Next is to attach a dispatch function to components/elements responsible for calling the slice reducers to update the counter state. An action method must be invoked within the dispatch function.
Now, go into your Increase.jsx, Decrease.jsx, Reset.jsx files, and paste in the codes below accordingly:
// Increase.jsx

import { useDispatch } from "react-redux";
import { increase } from "../redux/counter.slice";

const Increase = () => {
  // subscribe dispatch to component
  const dispatch = useDispatch();

  return <button onClick={() => dispatch(increase())}>Increase</button>;
};

export default Increase;
// Decrease.jsx

import { useDispatch } from "react-redux";
import { decrease } from "../redux/counter.slice";

const Decrease = () => {
  const dispatch = useDispatch();

  return <button onClick={() => dispatch(decrease())}>Decrease</button>;
};

export default Decrease;
// Reset.jsx

import { useDispatch } from "react-redux";
import { reset } from "../redux/counter.slice";

const Reset = () => {
  const dispatch = useDispatch();

  return <button onClick={() => dispatch(reset())}>Reset</button>;
};

export default Reset;
Conclusion
This tutorial, originally my presentation topic in My React Plugin Journey, walked you through how to manage states in your React application using traditional React hooks like useState, useReducer, and context APIs. We also learned how complex application states can be managed using a third-party state management library like Redux Toolkit.
You can explore the repo I created for this tutorial. The repo contains different branches, each focusing on the traditional or modern approach to managing states in React applications.
That's all, folks! I hope this was helpful. Please leave feedback, share the article with friends, and connect with me on LinkedIn.